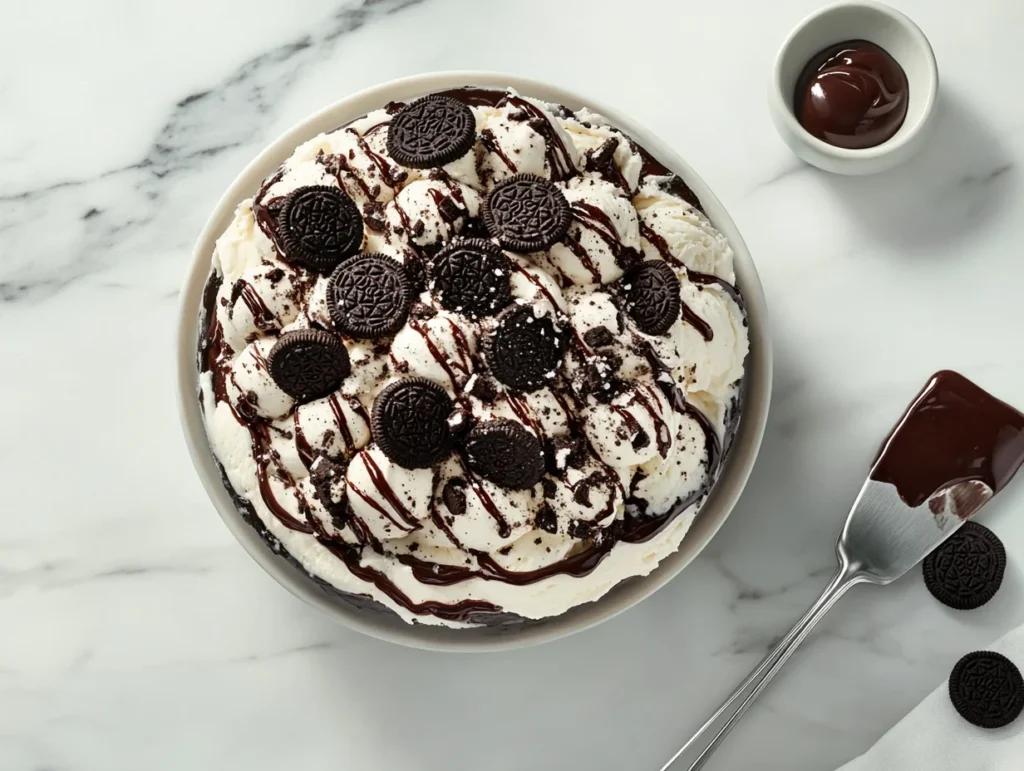
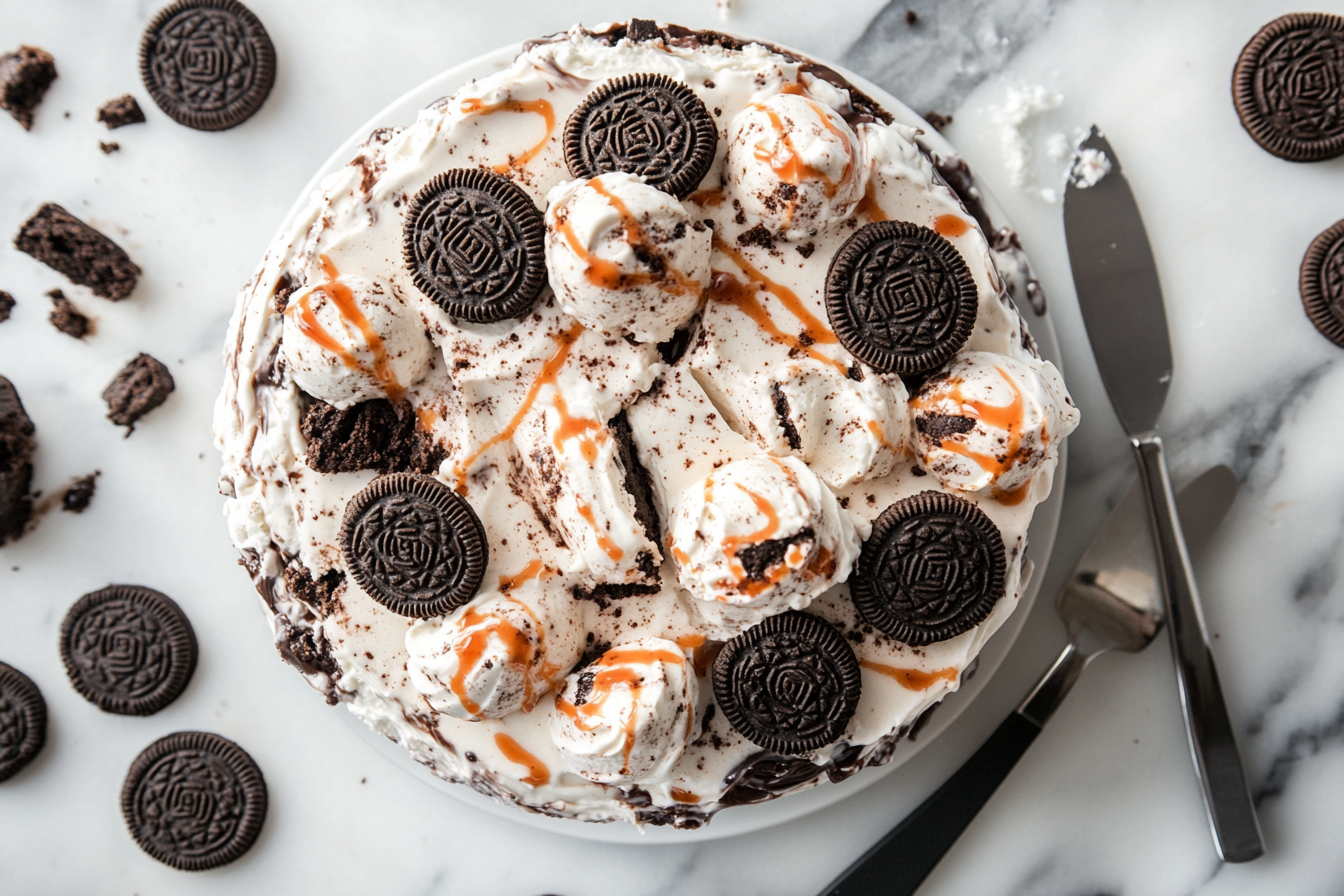
There’s undoubtedly something truly magical about an Oreo Ice Cream Cake—a dessert that combines two of the greatest indulgences in life: Oreos and ice cream. Whether you’re looking for a sweet treat for a birthday party, a summer BBQ, or even just because you deserve it, this cake is guaranteed to be a hit. At the same time, here at Kai Recipes, we believe in making cooking and baking not only accessible but also enjoyable, and this no-bake dessert perfectly aligns with our philosophy.
Moreover, with its simple preparation and show-stopping presentation, this Oreo Ice Cream Cake is destined to be your new favorite dessert. In addition, it’s a no-bake option, meaning you can make it even on the hottest summer days without breaking a sweat. Altogether, this cake is all about cool, creamy layers and delicious Oreo crunch, making it ideal for anyone who loves the irresistible combination of cookies and ice cream.
In This Guide
Why Oreo Ice Cream Cake is the Perfect Dessert
Who doesn’t love Oreos? They’re an iconic treat loved by kids and adults alike. Now, imagine taking that Oreo flavor and blending it with creamy ice cream, hot fudge, and whipped cream. As a result, it’s the ultimate dessert mashup! This cake features a crunchy Oreo crust, topped with rich, creamy ice cream, and layered with hot fudge. Finally, it’s finished with fluffy whipped cream and even more Oreos. Doesn’t that sound perfect?
Here are a few reasons why this cake stands out:
- It’s a no-bake dessert, making it perfect for those hot days when you don’t want to turn on the oven.
- It’s incredibly customizable. Whether you want to try different Oreo flavors or swap out the ice cream for something else, the options are endless.
- The combination of the crunchy Oreo base and creamy ice cream layers creates a texture explosion in every bite.
- It’s a great make-ahead dessert, perfect for birthdays, summer parties, or just a sweet treat whenever the mood strikes.
For even more fun ice cream cake ideas, check out some Creative ice cream cake recipes from around the web!
Key Ingredients You’ll Need
Let’s get started by gathering the ingredients you need to make this delightful Oreo Ice Cream Cake. The best part about this recipe is its simplicity, and most of the ingredients are probably already in your pantry or freezer.
- Oreos: The star ingredient! We’ll use these for both the crust and as a topping for the cake. Whether you choose regular Oreos, Mint Oreos, or even the Golden variety, it all depends on your taste.
- Ice Cream: Go classic with cookies and cream ice cream, or if you prefer, get creative with other flavors like chocolate chip, vanilla, or mint chocolate chip. You’ll need about 1.5 quarts.
- Fudge Sauce: This adds a layer of rich, chocolatey goodness. In addition, you can use store-bought hot fudge sauce, or make your own for a homemade touch.
- Whipped Cream: Either make your own whipped cream or simply use Cool Whip for a shortcut. It adds a light, fluffy layer that balances the richness of the ice cream and fudge.
- Butter: Melted butter helps bind the Oreo crumbs together to form a sturdy crust.
Optional Add-Ons:
- Chocolate Ganache: Drizzle this on top for extra decadence.
- Crushed Oreos: A great way to finish off the cake with extra crunch.
- Peanut Butter: Swirl it into the fudge layer for a chocolate-peanut butter twist.
These simple ingredients come together to create a frozen masterpiece. And if you want to explore more ways to use Oreos in your desserts, check out these Oreo dessert ideas!
Step-by-Step Instructions to Make Oreo Ice Cream Cake
Now that you have all your ingredients ready, let’s dive into the details of how to put this Oreo Ice Cream Cake together. Don’t worry if you’re not a seasoned baker—this recipe is incredibly easy to follow.
1. Preparing the Oreo Crust
The first step is creating the crust, which is a blend of crunchy Oreo crumbs and melted butter. This forms the foundation of the cake, giving it that classic Oreo flavor with every bite.
- Start by crushing 25-30 Oreo cookies into fine crumbs. You can use a food processor to make this quick and easy, or if you prefer, place the Oreos in a large Ziploc bag and crush them with a rolling pin.
- Melt ½ cup of butter and mix it with the Oreo crumbs until everything is well coated.
- Press the Oreo-butter mixture into the bottom of a 9-inch springform pan. Make sure to press it down firmly to create an even, compact crust.
- Place the pan in the freezer for 15-20 minutes to set while you prepare the next layer.
Tip: Want to switch things up? Try using Mint Oreos for a refreshing twist or even add a thin layer of peanut butter on top of the crust before adding the ice cream!
2. Creating the Ice Cream Layer
This is where the fun begins! The ice cream layer is what makes this dessert so creamy and indulgent. To get it just right, the key is to slightly soften the ice cream so it spreads easily over the Oreo crust.
First, take out your ice cream (about 1.5 quarts) and let it sit at room temperature for 10-15 minutes. You want it soft enough to spread but not too melted, as that can make it runny.
Next, spread the softened ice cream evenly over the Oreo crust, using a spatula to smooth it out. Make sure to cover the entire surface of the crust.
After that, once the ice cream layer is in place, return the cake to the freezer for at least 1-2 hours, or until the ice cream is firm.
Pro Tip: You can make this cake extra special by layering different flavors of ice cream. For example, try using cookies and cream for one layer and mint chocolate chip for another. It’s like having two cakes in one!
3. Adding the Fudge Layer
The next layer is where the real indulgence kicks in. Hot fudge sauce is drizzled over the ice cream, creating a rich and gooey layer of chocolate.
- Warm about 1 cup of hot fudge sauce in the microwave for 15-20 seconds—just enough to make it pourable but not too runny.
- Pour the fudge sauce over the ice cream layer and spread it evenly with a spatula.
- If you want, sprinkle some crushed Oreos over the fudge layer for added texture.
- Place the cake back in the freezer for another 1-2 hours to allow the fudge to set.
Variation: For a delicious twist, swirl a few spoonfuls of peanut butter into the hot fudge before adding it to the cake. It adds an extra layer of flavor that peanut butter fans will love.
4. Topping with Whipped Cream

The whipped cream layer adds a light, fluffy finish that balances out the richness of the ice cream and fudge. You can make your own whipped cream from scratch, or if you’re short on time, Cool Whip works perfectly.
- Spread a thick layer of whipped cream over the fudge. You can smooth it out with a spatula or get fancy by piping decorative swirls around the edges.
- Return the cake to the freezer for another hour or until the whipped cream is set.
Decoration Tip: Garnish the cake with extra crushed Oreos, chocolate chips, or even a drizzle of chocolate ganache. It’s an easy way to make your cake look like it came straight from a bakery!
5. Final Assembly and Decoration
Now it’s time to bring everything together. Once the cake is fully set, it’s ready to be decorated and served!
- Remove the cake from the freezer about 10-15 minutes before serving to make slicing easier.
- For a professional finish, drizzle the top with a bit of chocolate ganache or extra fudge sauce.
- Add a few whole Oreos or crushed Oreos around the edges for decoration.
- If you’re feeling extra fancy, you can even pipe whipped cream rosettes around the perimeter of the cake.
Your Oreo Ice Cream Cake is now ready to serve! It looks stunning, tastes amazing, and is sure to impress anyone who gets a slice.
Creative Variations for Your Oreo Ice Cream Cake
The best thing about this recipe is how easy it is to customize. Here are some ideas to get you started:
- Different Ice Cream Flavors: Experiment with flavors like mint chocolate chip, chocolate chip cookie dough, or even strawberry for a fruity twist.
- Vegan and Dairy-Free Options: Swap out the regular ice cream for a dairy-free alternative like coconut-based ice cream and use coconut whipped cream for the topping.
- Layered Ice Cream Cake: Want more than one flavor? Create layers of different ice cream flavors for a more dynamic cake. Try cookies and cream on the bottom and chocolate chip on top.
- Add Peanut Butter: For a decadent twist, swirl peanut butter into the fudge layer, or add it as a separate layer between the crust and ice cream.
If you’re looking for more inspiration, check out these Ice cream desserts for kids for fun, kid-friendly versions of this cake!
Tips for Making the Best Oreo Ice Cream Cake
Making an Oreo Ice Cream Cake is straightforward, but a few tips can help you get the best results:
- Softening Ice Cream: Make sure to let your ice cream soften for about 10-15 minutes before spreading. This makes it easier to work with, but don’t let it melt too much, or it will become too runny.
- Freezing Times: Be patient with freezing! Let each layer freeze fully before adding the next. This will ensure that the layers stay distinct when you cut into the cake.
- Cutting the Cake: Use a sharp knife dipped in warm water for clean slices. Be sure to wipe the knife between cuts to keep the slices looking neat.
- Storage Tips: If you have leftovers (lucky you!), wrap the cake tightly in plastic wrap and store it in the freezer for up to 7 days.
For more no-bake dessert ideas, check out our guide to easy No-bake dessert ideas!
How to Customize for Different Occasions
This Oreo Ice Cream Cake is a versatile dessert that can be tailored to suit any event:
- Birthday Cake Ideas: Add candles, colorful sprinkles, and a personalized message written in frosting to make this cake birthday-ready.
- Summer Party Dessert: Serve the cake as individual bars for an easy-to-eat treat that’s perfect for outdoor events.
- Holiday-Themed Variations: Use red velvet Oreos for Valentine’s Day or pumpkin spice Oreos for a festive fall cake.
With just a few tweaks, this cake can fit any celebration, making it a go-to dessert for every occasion.
Serving Suggestions for Oreo Ice Cream Cake
This cake is best served slightly thawed, so let it sit at room temperature for 10-15 minutes before cutting. This ensures that the layers are soft enough to slice through easily and that the flavors are at their peak.
- Extra Treats: Serve with a scoop of extra ice cream, or drizzle each slice with hot fudge for a sundae-style dessert.
- Fruit Pairings: For a refreshing contrast, add some fresh berries like strawberries or raspberries on the side. The tartness of the berries complements the richness of the cake perfectly.
Oreo Ice Cream Cake for Special Diets
This Oreo Ice Cream Cake can easily be adapted to meet various dietary needs:
- Dairy-Free: Use coconut or almond-based ice cream along with dairy-free whipped cream to create a version that’s free of dairy but still full of flavor.
- Gluten-Free: Simply swap out regular Oreos for gluten-free Oreos to make a gluten-free version that tastes just as delicious as the original.
- Vegan Options: Ensure that all your ingredients are plant-based, such as vegan ice cream and dairy-free fudge sauce. Fortunately, vegan ice cream options are widely available in most supermarkets these days!
With just a few simple swaps, this cake can be enjoyed by just about anyone!
Frequently Asked Questions
- Can I make this cake in advance?
- Absolutely! In fact, making the cake a day or two in advance is ideal because it gives each layer plenty of time to set.
- How do I prevent the cake from becoming too hard to cut?
- To prevent this, let the cake sit at room temperature for about 10-15 minutes before cutting. Additionally, dipping your knife in warm water helps create clean slices.
- Can I use different types of cookies?
- Definitely! While Oreos are the classic choice, you can experiment with other cookies like chocolate chip cookies or graham crackers for a different crust.
- What’s the best way to store leftovers?
- Wrap the cake tightly in plastic wrap and keep it in the freezer for up to 7 days. Also, storing it in an airtight container helps prevent freezer burn.
- Can I make a smaller or larger version of the cake?
- Yes! If you want a smaller cake, simply halve the ingredients and use a smaller pan. For a larger cake, double the ingredients and use a bigger pan or create multiple layers.
Conclusion
And there you have it—a delicious, no-bake Oreo Ice Cream Cake that’s perfect for any occasion. Whether you’re hosting a summer party, celebrating a birthday, or just craving something sweet, this cake is sure to impress. Thanks to its simple ingredients and customizable layers, this cake is not only easy to make but also incredibly fun to personalize.
Feel free to try different variations, add your own twist, and most importantly, enjoy the process of making (and eating!) this irresistible dessert. Lastly, when you’re ready for more, don’t forget to explore our Easy gluten-free dessert recipes and the Strawberry cheesecake ice cream recipe for even more sweet inspiration!
Print
Oreo Ice Cream Cake Recipe: Easy No-Bake Dessert
- Total Time: 4 hours (including freezing time)
- Yield: 12 servings 1x
- Diet: Vegetarian
Description
A delicious no-bake Oreo Ice Cream Cake that’s creamy, crunchy, and packed with rich chocolatey flavors. Perfect for any occasion!
Ingredients
- 25–30 Oreo cookies
- 1/2 cup melted butter
- 1.5 quarts cookies and cream ice cream (or preferred flavor)
- 1 cup hot fudge sauce
- 2 cups whipped cream or Cool Whip
- Extra crushed Oreos for topping
Instructions
- Crush Oreos into fine crumbs using a food processor or a sealed bag and rolling pin.
- Mix crushed Oreos with melted butter and press into the bottom of a 9-inch springform pan.
- Freeze crust for 15-20 minutes.
- Soften ice cream for 10-15 minutes, then spread evenly over the Oreo crust.
- Freeze for at least 1-2 hours until firm.
- Warm hot fudge sauce slightly, then spread over the ice cream layer.
- Return to freezer for another 1-2 hours.
- Spread whipped cream evenly over the top and freeze for an additional hour.
- Garnish with crushed Oreos before serving.
- Let sit at room temperature for 10-15 minutes before slicing.
Notes
For a twist, try using different ice cream flavors or adding a peanut butter swirl to the fudge layer.
Nutrition
- Serving Size: 1 slice
- Calories: 380
- Sugar: 30g
- Sodium: 200mg
- Fat: 18g
- Saturated Fat: 10g
- Unsaturated Fat: 7g
- Trans Fat: 0g
- Carbohydrates: 48g
- Fiber: 2g
- Protein: 4g
- Cholesterol: 35mg

